A Whiter Smile at Home
I’ve talked about my experience with Zoom Whitening on the blog before, how it was expensive, extremely painful and the results didn’t last that long. I’m always looking for ways to keep my pearly teeth white, but from the comfort of my own home. I’ve tried endless amounts of at-home whitening kits, white strips, gel pens, and whitening toothpastes, and although all these are great alternatives to professional whitening, they never really provided the same professional results you’d get from the dentist’s office. The main factor that these over-the-counter take-home kits don’t work nearly as well, is partly because we all have different size mouths and teeth shapes and the trays never really fit properly. Another concern is as soon as your saliva comes in contact with the gels, it loses its effectiveness.
Smile Brilliant is a US national dental laboratory that’s designed to offer effective teeth whitening treatments, with the same professional results you’d achieve at a dentist’s office, but with a much lower cost. The only true way to get professional whitened teeth is with custom-fitted whitening trays and professional strength teeth whitening gels, which can cost upwards of $500+ at your local dentist’s office. Smile Brilliant provides you with a kit to help you create your own personalized mold of your teeth. You simply use the mold found in your kit, ship back the molds and let the laboratory create hand crafter, custom fitted teeth whitening plastic aligner trays that are formed to fit your teeth with precision, allowing you to whiten your teeth more effectively.
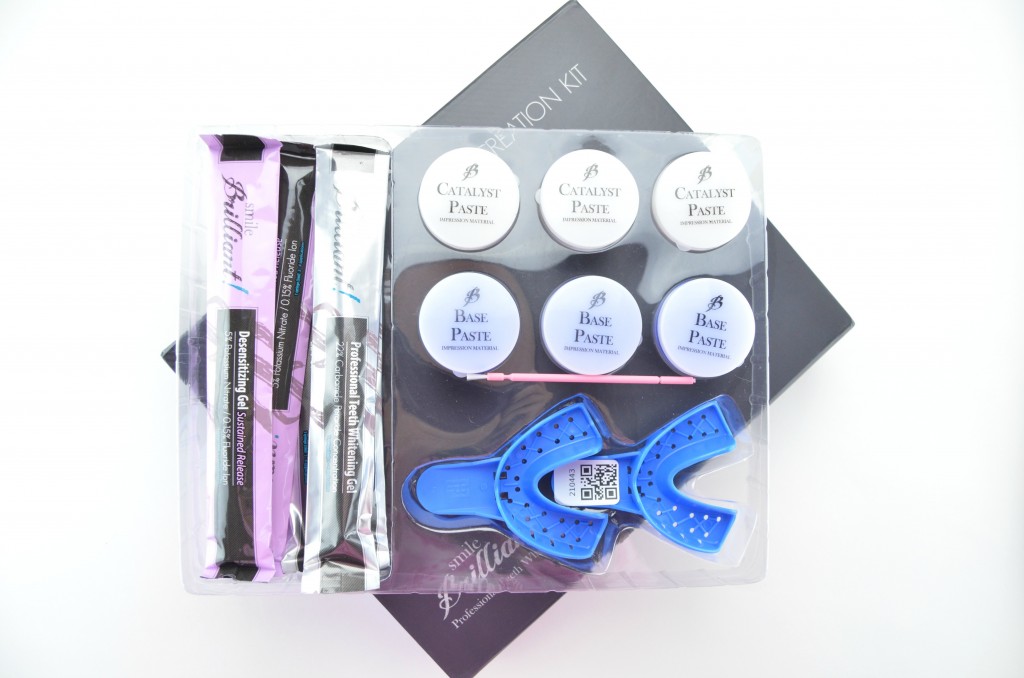
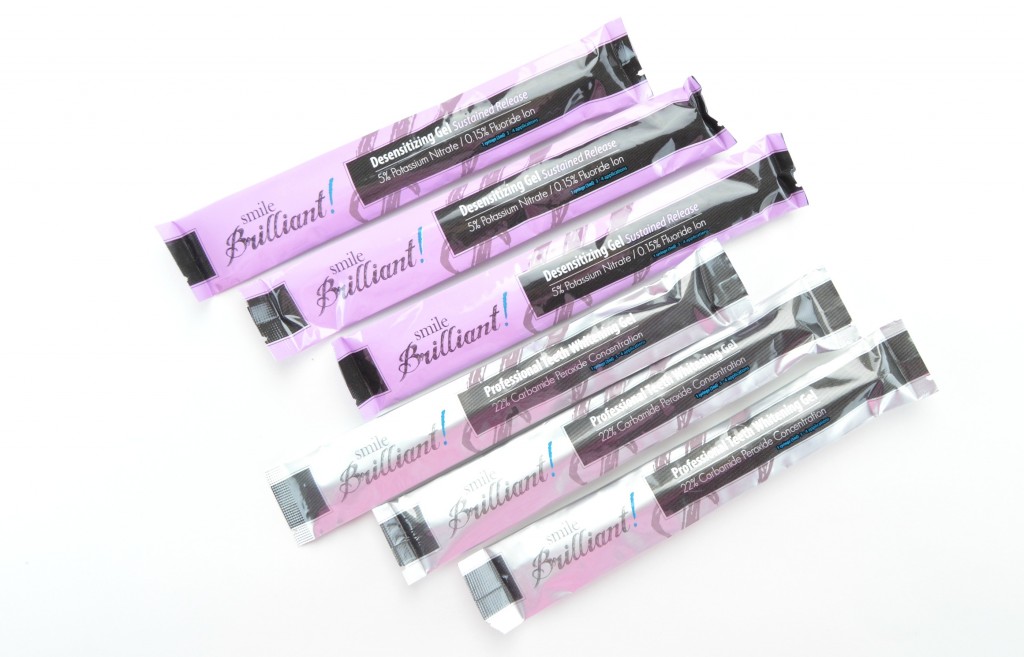
Smile Brilliant Kit comes with everything you need for a whiter smile. It contains 2 custom-fitted whitening trays (upper and lower teeth), compact carrying case to hold both your whitening trays, impression materials to make your own dental impressions, a 3-Way, pre-paid postage package to ship your molds to the lab, a set of custom dental models created by lab technicians from your impressions, 3 professional teeth whitening gels, all backed by a 30 day satisfaction guarantee, a 2 year teeth whitening tray replacement warranty and a detailed instruction brochure to get the most out of your kit.
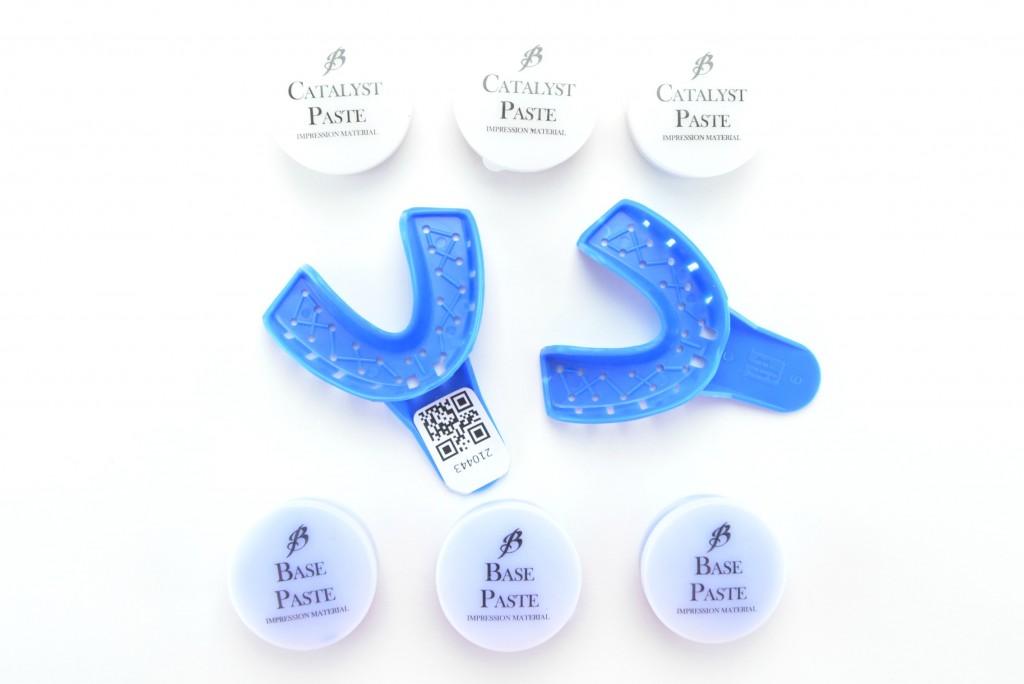
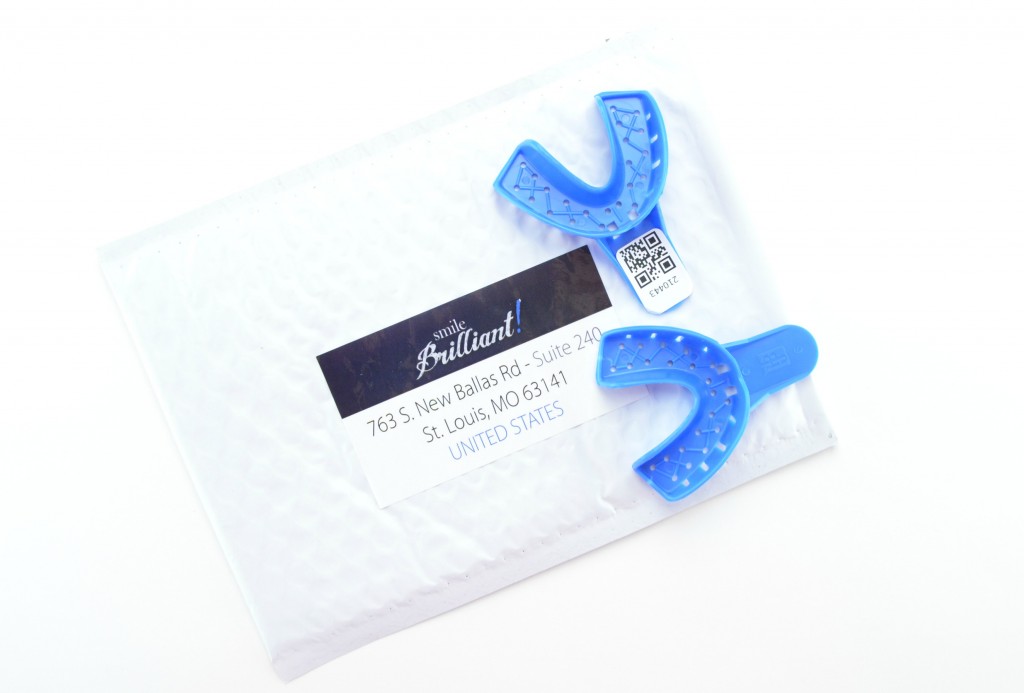
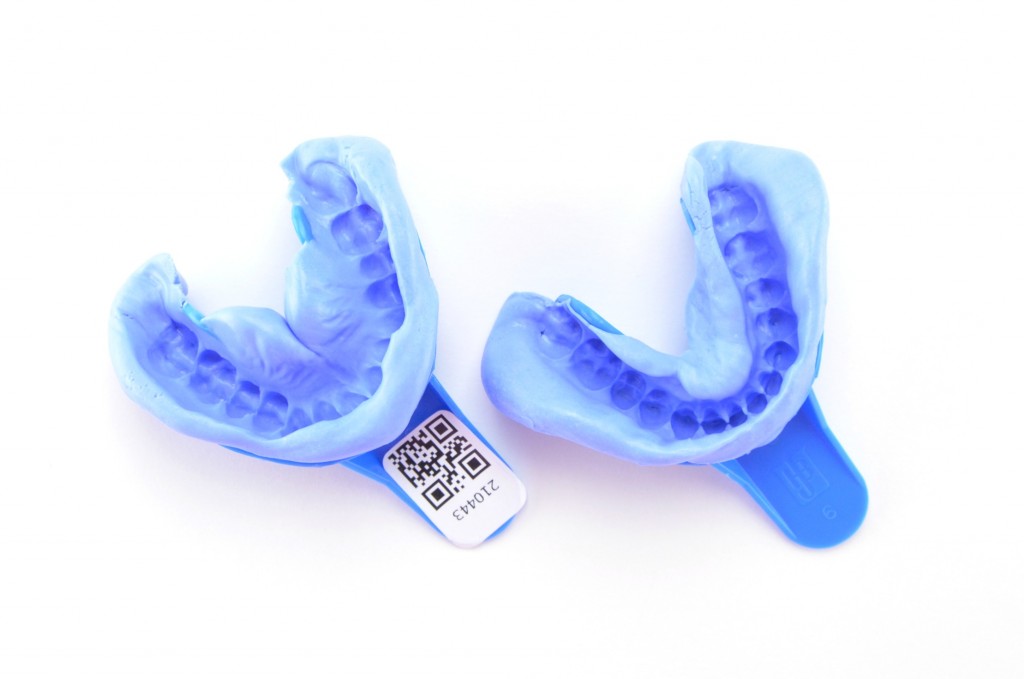
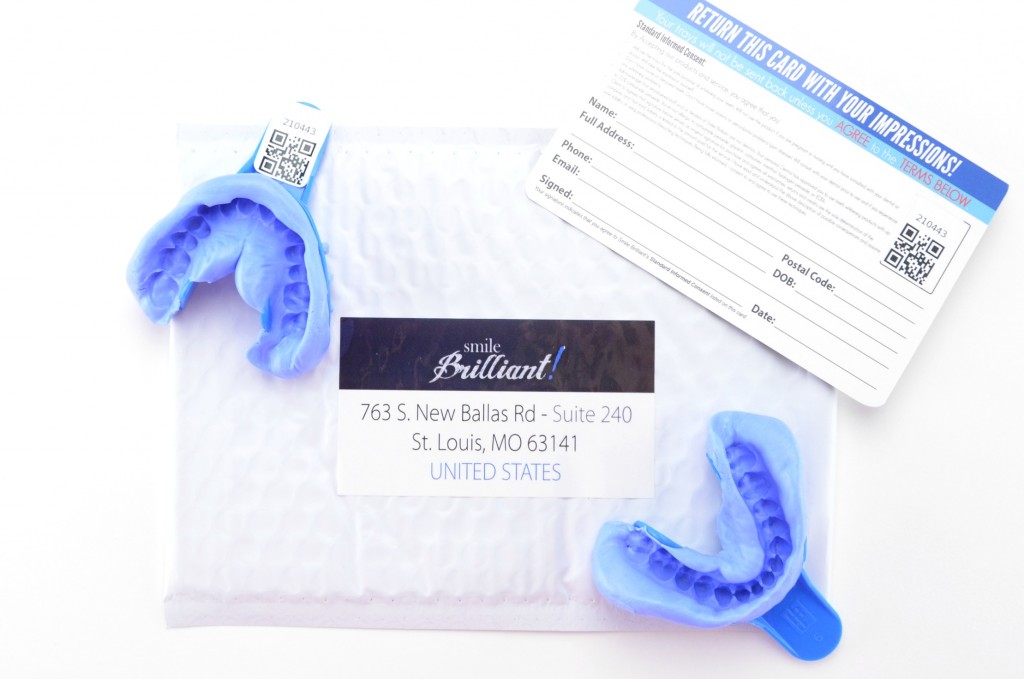
When your kit arrives, it’s your job to create your teeth molds, place in prepaid envelope and ship back. The lab will then create your custom whitening trays and ship back to you within a few short weeks. Start by brushing your teeth, making sure they’re completely clean and then open one jar of the blue paste and one jar of the white paste. Mix thoroughly by continuously folding in half over and over again, until it’s a solid blue shade. This step shouldn’t take longer than 60 seconds, then simply set putty in tray, spreading evenly within 30 seconds. This can be a little nerve racking, but your kit includes an extra set of putty, in case a mistake is made. Quickly place the tray evenly into your top teeth, by posting 3 fingers on the bottom of the tray and pressing firmly. Let the putty sink into your teeth and do not remove until material is firm, about 2.30 minutes. Repeat again for the bottom teeth. I know this sounds a little tricky, but Smile Brilliant includes a step-by-step guide with beautiful illustrations to help you understand this process a little easier. Once you’re finished with both the top and bottom molds, let impressions sit for at least 30 minutes, before placing trays into the bubbled, pre-paid envelope. Fill out the return card, so Smile Brilliant knows who to send the whitening trays back to, and place in mail. Couldn’t be easier. Your custom whitening trays will be created and shipped back to you within 5 days, of course, it will take a little longer to arrive back to Canada though.
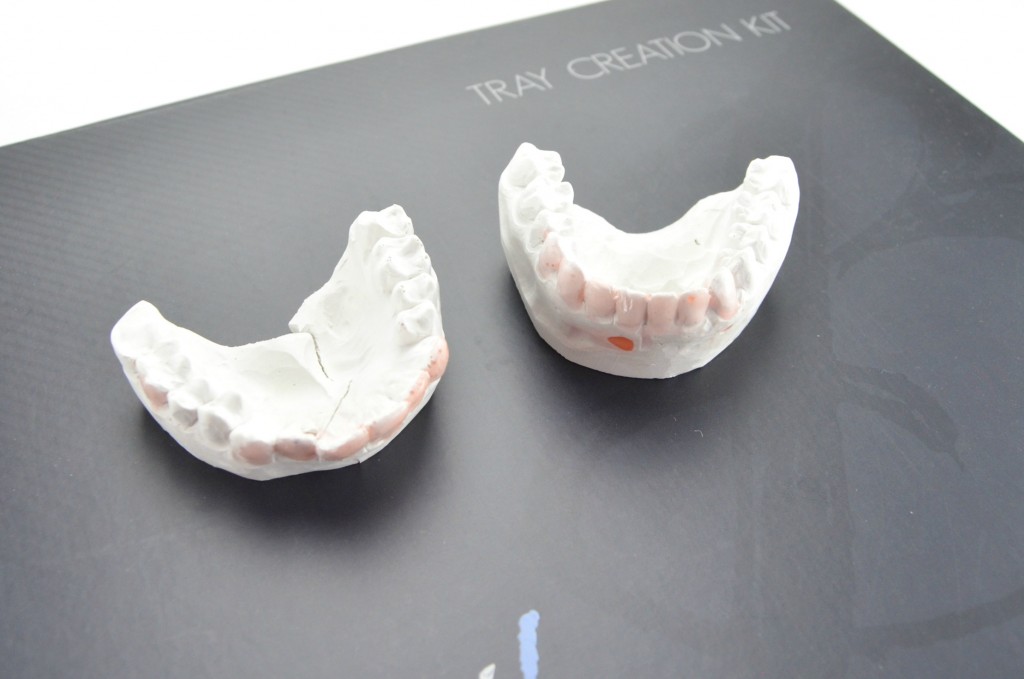
Smile Brilliant sent me my plaster molds of my teeth to show you how they create your custom trays, of course, you will not receive these in your package, and it’s only for reference. My custom trays fit like a glove and are extremely comfortable to wear thanks to its slightly flexible, plastic material. It doesn’t irritate or annoy the gums, in fact, I don’t even notice I have them in. Now comes the fun part, the whitening process. Simply apply a thin layer of gel to the inner front surface of the tray and insert trays using a forward pressing motion to avoid dragging. The gel, which is refreshing and minty, will instantly spread evenly over the front surface of the teeth and begin whitening. There is no set time on how long you can keep them in, just as long as it’s no longer than 3 hours. Of course, the longer the gel is in contact with your teeth, the quicker the stains will be removed and the whiter your teeth will be. Remember to rinse and wash the trays after every use and place in compact carrying case for safe keeping.
The only side effects that may occur is, tooth sensitivity. This is related to dehydration of the teeth and gums, due to the peroxide ingredients. Smile Brilliant has included desensitization gels that’s applied prior to the whitening gel, to help prevent sensitivity. This unique and innovated gel contains potassium nitrate and fluoride ions which help reduce sensitivity. Simply apply a small amount of gel to the interior, middle of the bottom of the tray and place in mouth for 5 to 15 minutes prior to whitening. I haven’t experienced any tooth sensitivity while using these gels and as an added bonus, it has a sweet, candy taste to it. You will start to see a huge improvement after your first session, up to 7 shades whiter, with dramatic results after 5 to 6 days. It’s recommended that you continue for 12 consecutive days, then just follow up with touch-ups as need be. To keep that brilliant white smile, you’ll want to whiten at least once a month.
It’s only been a week, but I’ve experienced dramatic results. I’m not going to lie, although it’s extremely easy to apply, it can be a little inconvenient at times. You’re unable to eat or drink for the deration of your whitening process, which I’ve been keeping my trays in for 3 hours at a time, and I’m also unable to talk, in fear saliva will get into the trays and make the gel less effective. I do, however, love that I don’t have to keep taking out the trays and refilling it with gel every 20 minutes and hold a LED light against my mouth for hours on end. I have to say, out of all the whitening products I’ve tried over the years, and I’ve experimented with plenty, this is the closest you’ll achieve to professional teeth whitening at home. Of course, to help keep your smile white, its best to avoid coffee, tea, tobacco and other dark liquids that may stain your teeth for at least 48 hours after each treatment. This is next to impossible for me, I don’t think I can go without caffeine for an entire week, but I try to use a straw and brush my teeth immediately after consumption.

The kit comes with 3 syringes of teeth whitening gel, enough for about 9 to 12 whitening sessions, but packs of 3, 6 and 9 syringes can be ordered when you run out, without having to buy the entire kit over again. The start-up kit retails for $152.10 with refills starting at only $44.32.
